A Step-by-Step Guide to Decorating the Perfect Bookshelf

Hi, I’m Jennifer, with Jennifer Decorates, and today we’re tackling something that can be a bit challenging for many people: how to accessorize a bookshelf. So, stick with me!
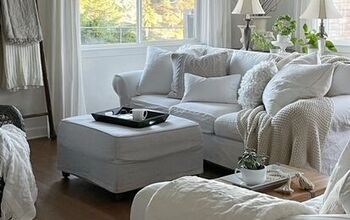
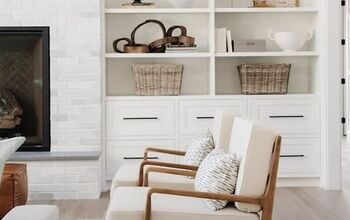
This is my bookshelf in my living room—it’s full of character and imperfections, but I absolutely love it.


Today, I want to show you, step-by-step, how to decorate a bookshelf in a way that’s balanced and beautiful. I know that a lot of people struggle with bookshelves looking cluttered or unbalanced, but with the tips I’ll be sharing, your bookshelf will look gorgeous and visually pleasing. Let’s get started!

The first thing I’m going to do is choose some books. I’m pretty picky about the books I use—I don’t like paperbacks or books with dust jackets.

My favorite kind of books to use are antiques, and I like to pick ones with neutral colors and interesting titles.

After selecting my books, I’m going to add large bookends to the middle shelf. This shelf is where the eye naturally gravitates, so it’s best to keep things simple and make a statement. These bookends will be perfect! I’ll vary the height and color of the books without going overboard. I want some variety, but I also want it to feel cohesive.

Once I’ve got my books in place, I’ll center everything on the shelf. It looks perfect! I really love the symmetry here. And since this is the middle shelf, it’s also a great spot for the books I reach for most often.

It’s important to add a little greenery to a bookshelf, so I’m doing something fun by adding moss balls to a rustic wire bucket. It’s a simple way to bring in color and life.

My second choice for greenery is a container filled with two faux stems I clipped down. This is super easy—just make sure to fluff them and leave plenty of space.

A good rule of thumb is to keep your greenery at least one shelf apart. I usually stick to two greeneries when I’m decorating bookshelves.

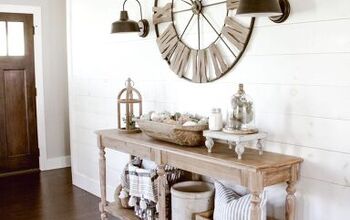
Next, I’m adding this awesome clock. I love its shape, and I believe every room needs something that shines, so this guy’s going up on the top shelf. To complete the shelf, I’ll add a wooden picture frame—love it!

I found these amazing gear pot things… honestly, I’m not sure what they are, but their varied height makes them work perfectly!

If you don’t have something like this, candlesticks would work just as well to mimic the effect. I’m also placing more books on their side, which will let me set a vintage camera on top.

You can use any kind of knick-knack you like for this—just make sure to give it some height by placing it on top of books or something similar. To finish this shelf, I’ll add another picture frame.

Finally, for the bottom shelf, I’m adding a vintage metal lunchbox.

And my last touch is this sweet little candle holder jar and key. I just love the charm they bring to the shelf.

The little mouse candle holder was actually one of my daughter’s favorite things when she was a kid, so it holds a special place in my heart.


And there you have it! It’s super easy, and everything on this shelf is to scale. There aren’t too many books or personal photo frames, and by using greenery, antique books, and vintage finds, I’ve created a perfectly accessorized bookshelf.


Comments
Join the conversation