Afro-Boho Shed Makeover: Organization, Storage & Design Touches

Thank you for joining me today as I complete a radical shed makeover in my backyard. I will be showing off my shed makeover before and after as I detail the entire process. Let’s jump right into this year’s DIY.
I did a little bit of prep work yesterday but today, I'm going to attempt to knock out this entire project.

It'll probably take me about eight hours because I am going to make over the inside of the shed.

I'm trying to go for a kind of potting shed construct. I have some other storage areas here on my property, and I'm under-utilizing them at the moment, so I want to better utilize those spaces to expand my urban garden. Here we go.

It is amazing how much stuff you can stuff into a fairly small space.


Here I am getting everything cleared out.
I'm going to leave this wood piece here. I built that at the beginning of the pandemic out of spare wood. The fence planks were repurposed from when I had the fence replaced.

This is five years of accumulation.

In fact, there is some great built-in storage under the porch over there that I am going to redo today as well to better utilize that space.

I want to move this Craftsman tool storage rack.

It is made of very hard plastic and is forty-eight inches wide, but where I want to move it is only forty-four inches wide, which means I have to get my saw.

I love this drill. It has one of those hammer features, and my son gave it to me last year for Christmas. I love that it has a light on it. This is a DeWalt 20V max.

That baby is on there nice and tight. To move this tool storage unit, I started with this piece in the corner because I wanted to reuse the holes that the previous homeowner put in here. This corner was going to be the tightest to line up, so I started there, and now I can just work my way across, and I'll be done in no time.

Now that it is done, It is a far better use of the space. I have big plans for the center area next: a big wooden potting cupboard.

The most challenging part about this whole radical shed remake from a storage unit to a potting shed is to set up all the organization and accessibility that I need. Luckily, the potting cupboard fit well in this space.

I have really maximized the storage potential in here in just a few short hours.

I’ll go ahead and pat myself on the back.

Next up, I'm about to use these hooks. You can drill little holes in the walls and then they can hold your tools which is super handy. I just need to figure out where I want everything to go.

I've been out here at it for about three hours so far, and I haven't missed a step. I have made so much progress. Now I'm starting to add in some of the more functional and decorative features.

I have better accessibility for all of my tools now. I can get to them with ease and efficiency, and I'm making a way better use of this corner.

I am going to keep working on it, and I will show you the final product soon.

I am gaining on it but I keep finding so many different types of gloves.

As a reminder, here is the before.

And here is the after.

There is plenty of organization no matter which direction you look in.

And everything I am storing in here is now easily accessible.

The Radical Storage Shed Makeover Transformation is complete. With my statement piece there in the center now. I got that chest from the thrift store probably four years ago. It came with glass panels but I took those out for safety reasons. It’s really a cool cabinet and the open shelves give it a vintage look.

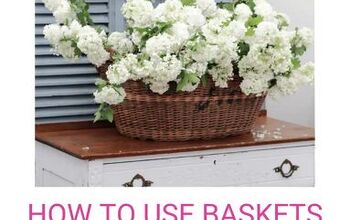
Most of this stuff I repurposed from somewhere else. You know just odds and ends stuff, baskets and things. I got this basket from the thrift store. This will be great for when I want to do leaf mulch or compost and I want to just transport it around.

This little flip trash can has soil in it.

This is a soil container up here that has soil in there now.

Here are some more of my hand tools, which are all hung right nearby.

Then I have my gloves that I use the most clipped and hung right up here.

I'll put a pretty plant in this planter when the weather turns warmer.

This is a repurposed dish drying rack that didn't fit in my house, so I just repurposed it outside. I have all of my stakes and small garden shears in it.

I have repurposed those macrame plant holders to hold my extra pots.

I also repurposed the sweet potato bags because I'm going to use these once I grow my own potatoes and need to store them.

I love this storage space up here. I'm finally able to store my extension cord standing up, and I could just pull one down here without any real issue.

This bucket here is actually a mosquito kit that I didn't use last year, so I'm going to set that up and use it in the coming season.

Lastly, over here, I have the beginnings of my container garden section here. These are actually a pot of dahlias, which did beautifully over last year.
DIY shed makeover
If you are contemplating a DIY shed makeover, let my shed makeover convince you that you are made for great things. All it takes is so foresight and a little sweat equity to have the potting shed of your dreams in your backyard.
What are you waiting for? Spill the details of your future DIY project in the comments section below.


Comments
Join the conversation